 English
 Dansk
Dansk Deutsch
 English
 Español
 Français
 Hrvatski
 Italiano
 Magyar
 Nederlands
 Norsk
Norsk Polski
 Română
 Slovenský
 Slovenščina
 Suomalainen
 Svenska
 Česky
Česky Ελληνική
 Български
The evenings on your balcony are getting longer, the air is warmer and you’re enjoying the peace and quiet with a cup of tea or a glass of wine. But you’re still missing that special something – a creative balcony display that brings your outdoor space to life. A homemade hanging basket is the perfect way to showcase your geraniums and transform your balcony, patio or garden into a colourful oasis of calm.
Whether it’s a macramé hanging basket, an upcycling project using old cups or a stylish hanging structure, here you’ll find creative, free DIY decorating ideas for all levels. Hanging flowerpots made from reclaimed materials will add a unique charm to your balcony and are a great way to reuse old items.
Let the decorating experts at Pelargonium for Europe inspire you to bring colour and life to your home with geraniums. Whether you’re a beginner or a pro, these amazing project ideas for hanging planters with geraniums will turn your outdoor space into a floral highlight!
Table of contents
Project idea 1: Boho flower hanger
Project idea 2: Make your own geranium hanging planter and bird feeder
Project idea 3: Simple macramé hanging baskets on spoon hooks
Bonus: Make your own hanging planter from a bicycle wheel rim
Tips to prevent waterlogging
Caring for geraniums in homemade hanging baskets
FAQs
Glossary
Project idea 1: Boho flower hanger
Difficulty level: ⭐⭐ medium
Love natural materials and a touch of vintage? Then this boho hanging basket project is for you! With very little effort, you can create a stylish hanging planter for geraniums that will enhance your balcony or patio, as well as your indoor space.
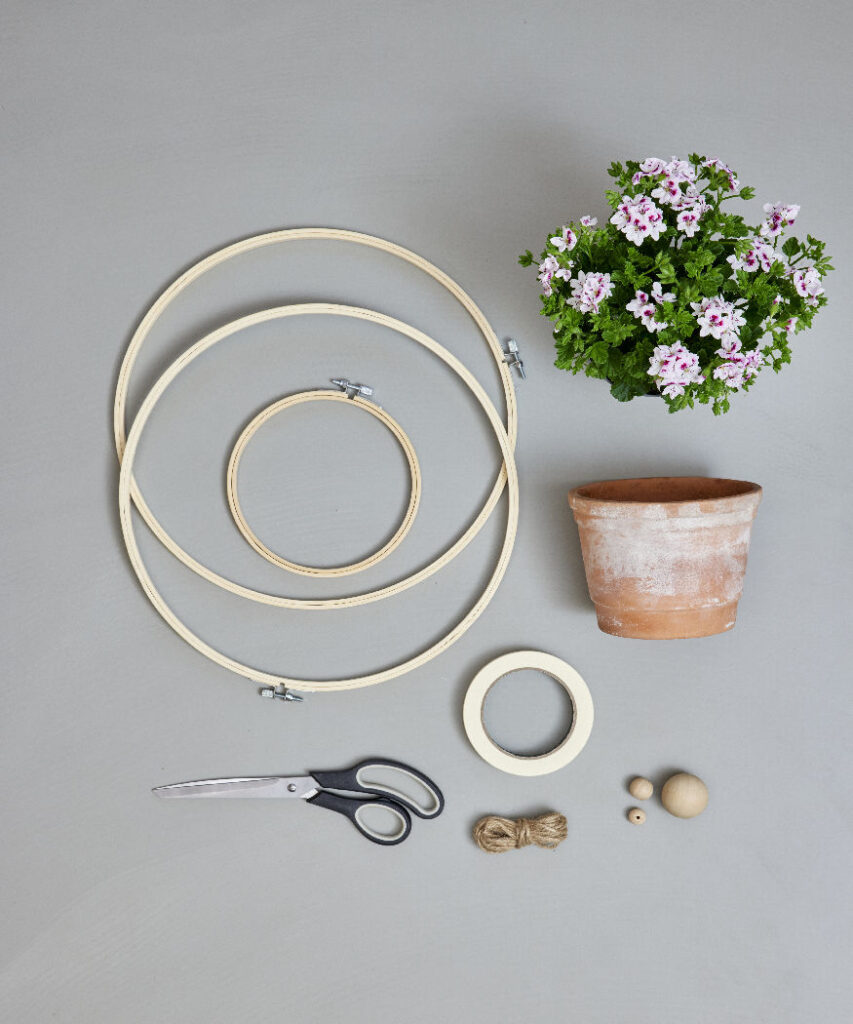
What you need:
- 2 large embroidery hoops (approx 30cm diameter)
- 1 small embroidery hoop (approx 13 cm in diameter)
- masking/gaffer tape
- twine or other decorative string
- 3 wooden beads in different sizes
- Scissors
- terracotta pot with a nice patina
- flowering geranium in a pot (e.g. butterfly geranium)
Step-by-step instructions
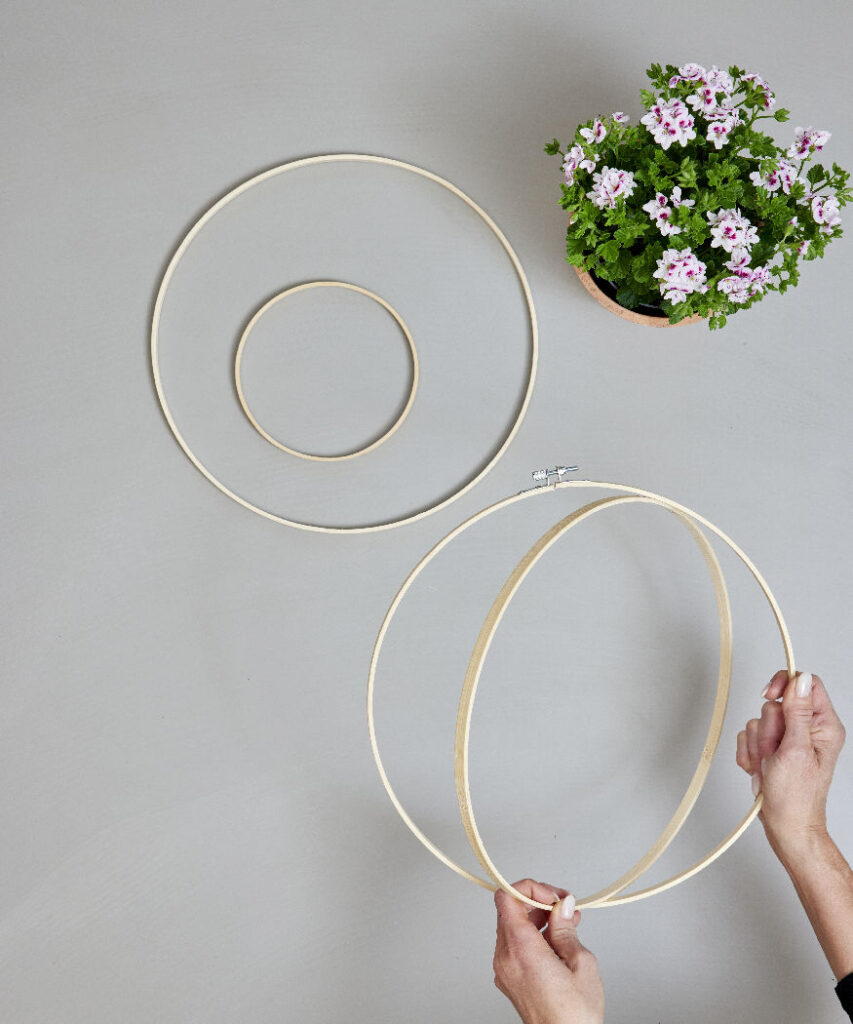
- First remove the inner ring from all three hoops. You don’t need the outer rings with screws for this project.
- To create a sturdy three-dimensional structure, first join the two large wooden rings together on one side with masking tape, then attach the small ring between the two larger rings on the opposite side. This ring will later be used to hold the flower pot.
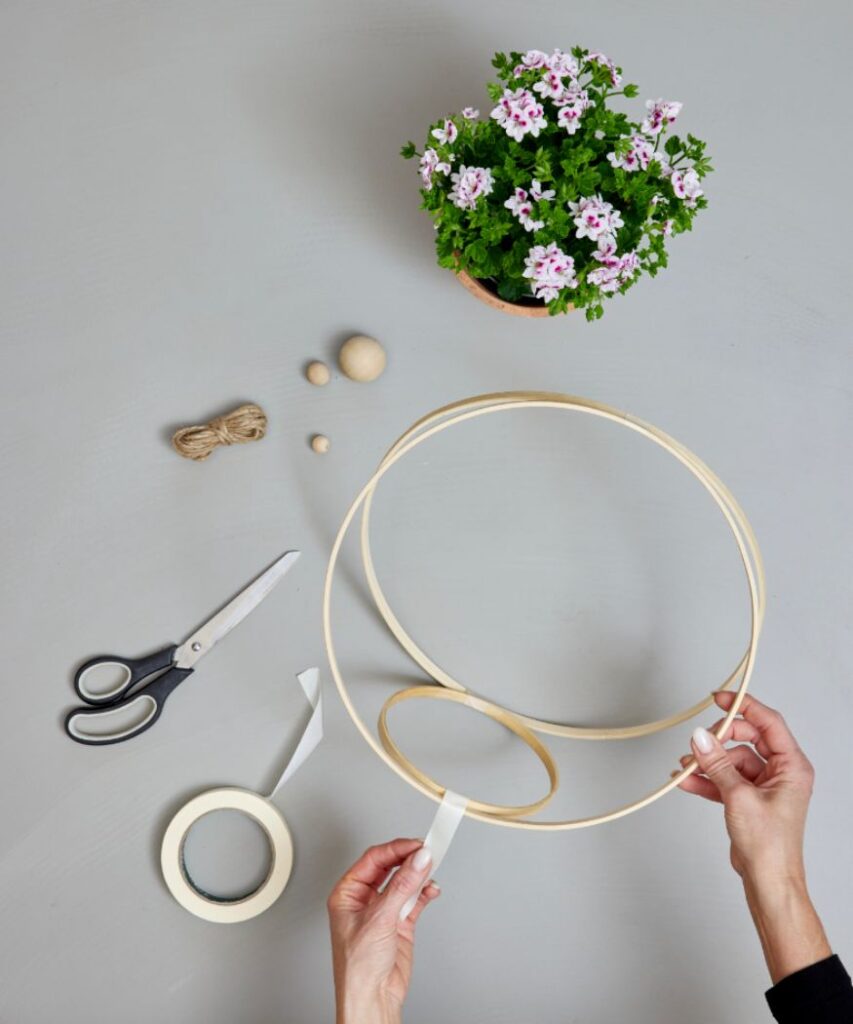
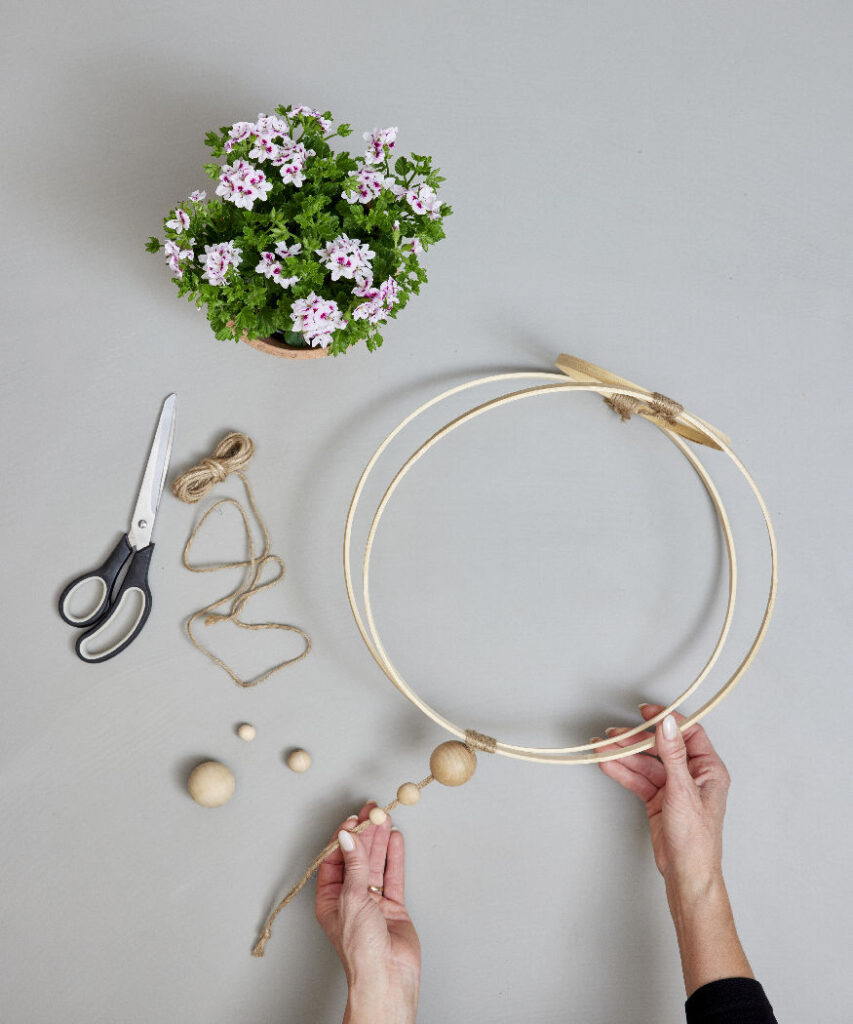
3. Cover the tape with the twine/string to hide it. For the hanging mechanism, thread a length of twine with three wooden beads of decreasing size. Attach this twine to the point where the large rings meet – the largest bead should sit on top of the ring.
4. Place the geranium in the terracotta pot then slot the pot into the ring holder. Hang your finished planter in a sunny spot and enjoy the flowers!

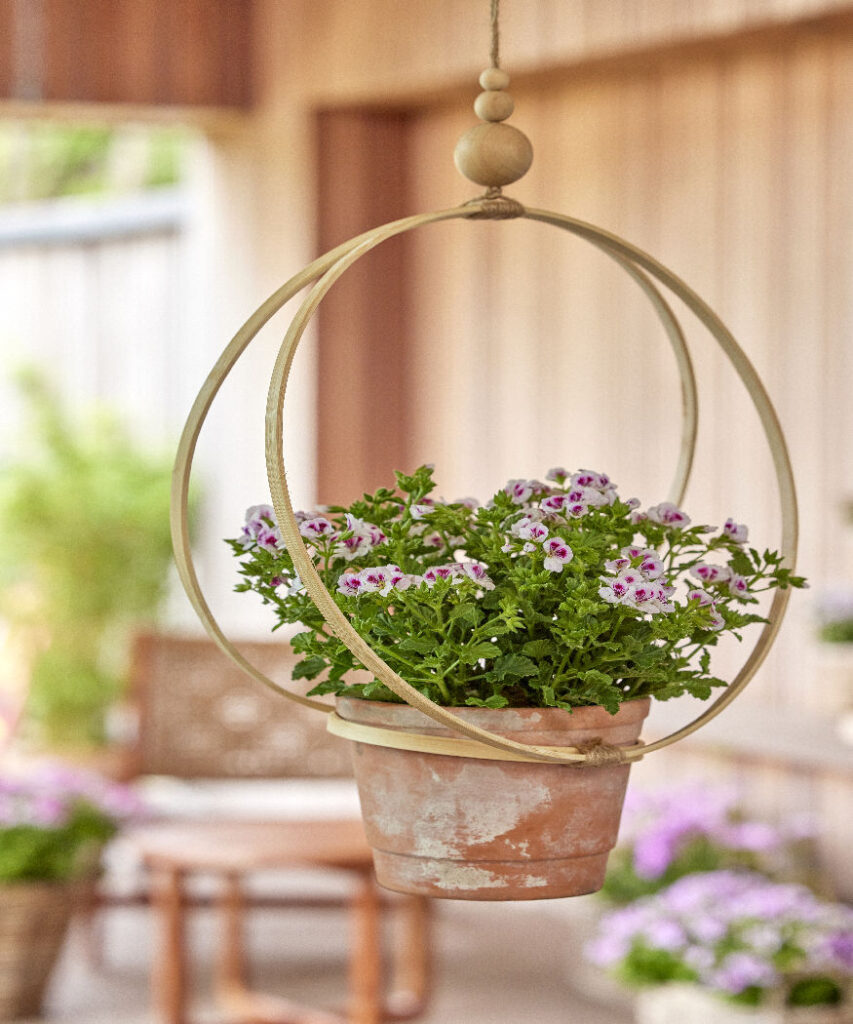
Tip: You can vary the size of the embroidery hoops. It’s important that the smaller hoop is 1-2cm smaller than the top diameter of the terracotta pot.
➡️ Watering geraniums: All you need to know
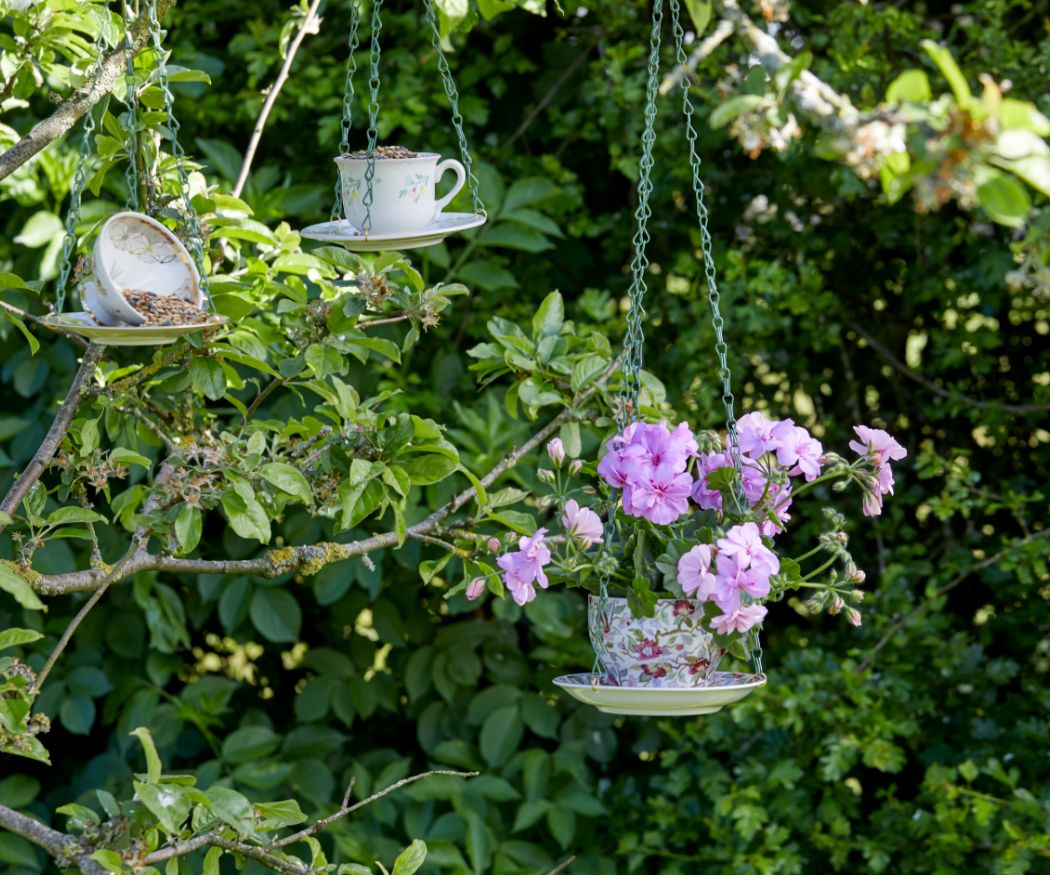
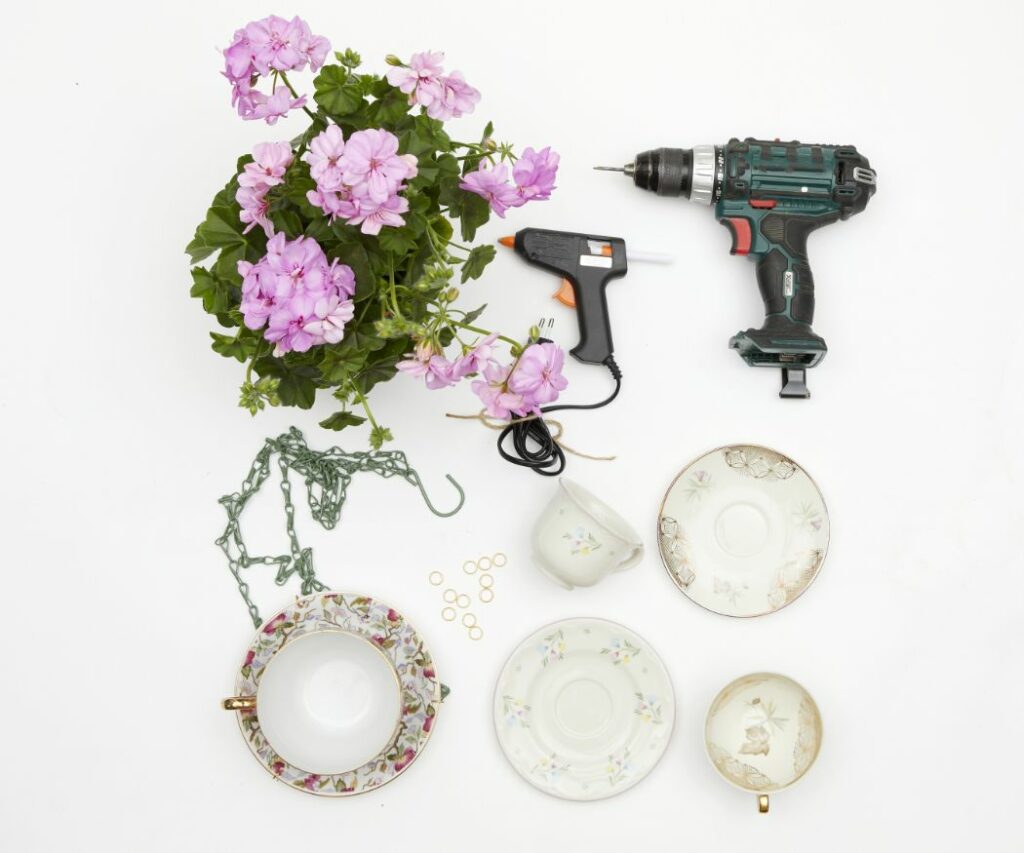
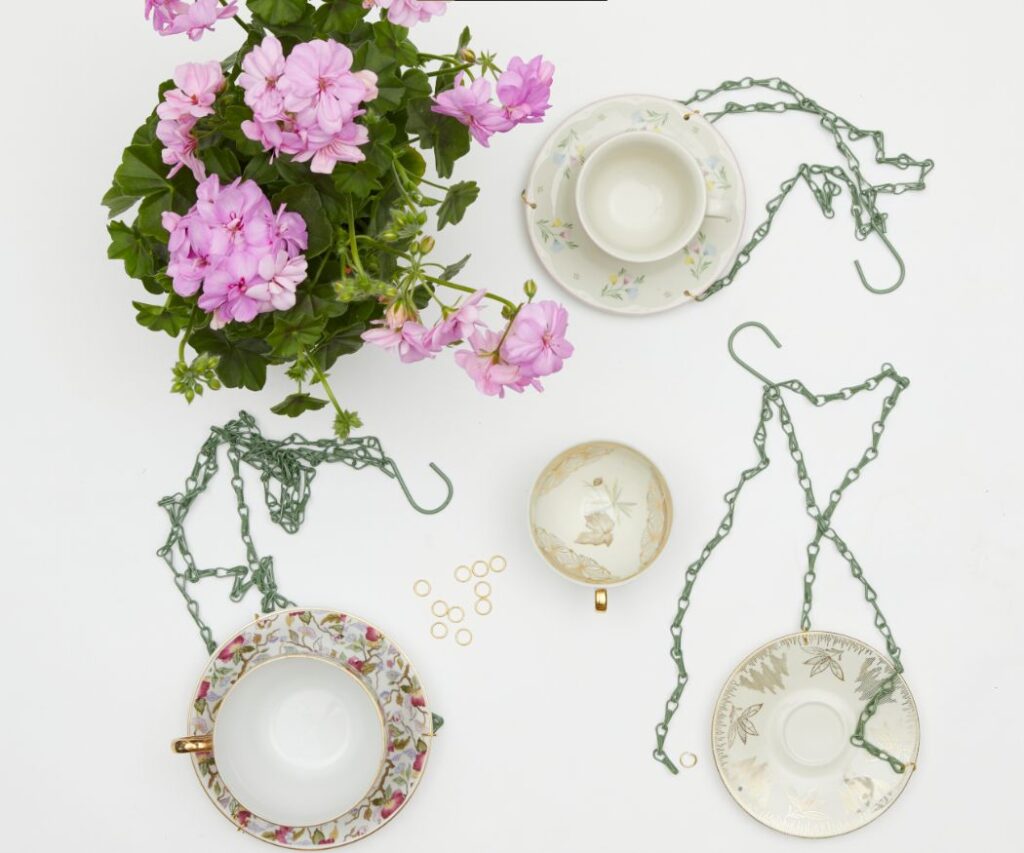
Project idea 2: Make your own geranium hanging planter and bird feeder

Difficulty level: ⭐⭐⭐ difficult
Too good to throw away! Old cups and saucers can be upcycled beautifully and transformed into stylish hanging features. This project combines a love of flowers with bird conservation – a charming combination of flowering geraniums and small feeding stations for feathered garden visitors. Plus sustainable planting for a green retreat.
What you need:
- 3 matching cups and saucers
- drill with glass or diamond drill bit (suitable for porcelain)
- a soft base (e.g. a towel or foam)
- metal chains and rings or hooks (also available as a set)
- pliers (if rings or chains need to be fixed)
- hot glue and glue gun
- clay shards or small pebbles (for drainage)
- a flowering geranium plant
- birdfood
Tip: Geraniums need enough space to thrive long-term, so use a cup/small bowl that’s as large as possible for this hanging planter. Or simply use this idea as a temporary display before moving your geraniums to a larger container or window box.
Instructions: Step-by-step
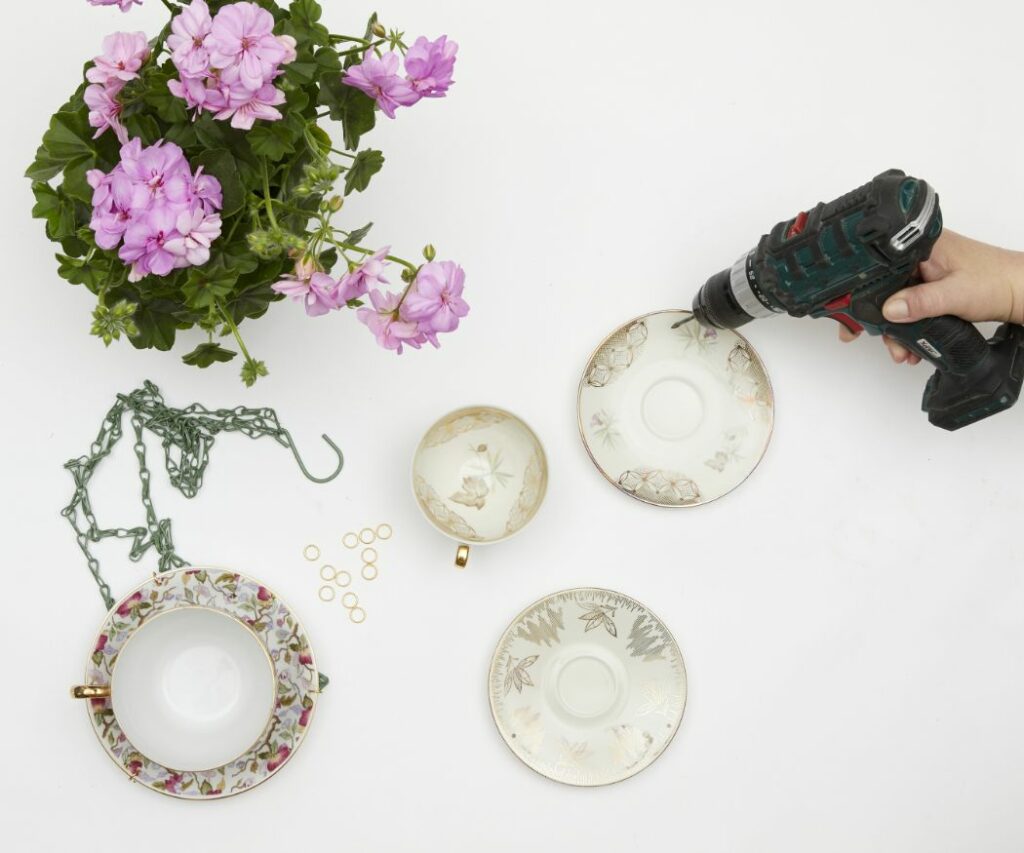
- Place each saucer on your soft surface to protect the porcelain. Using a glass or diamond drill bit, carefully make three small holes near the edges of the saucer. Start at low speed and apply light pressure to avoid cracking the surface. Cool with water if necessary.
- Thread the metal rings or hooks through the drilled holes and attach the chains to them. Use small carabiners or lightly press the rings together with pliers to ensure a secure fit.
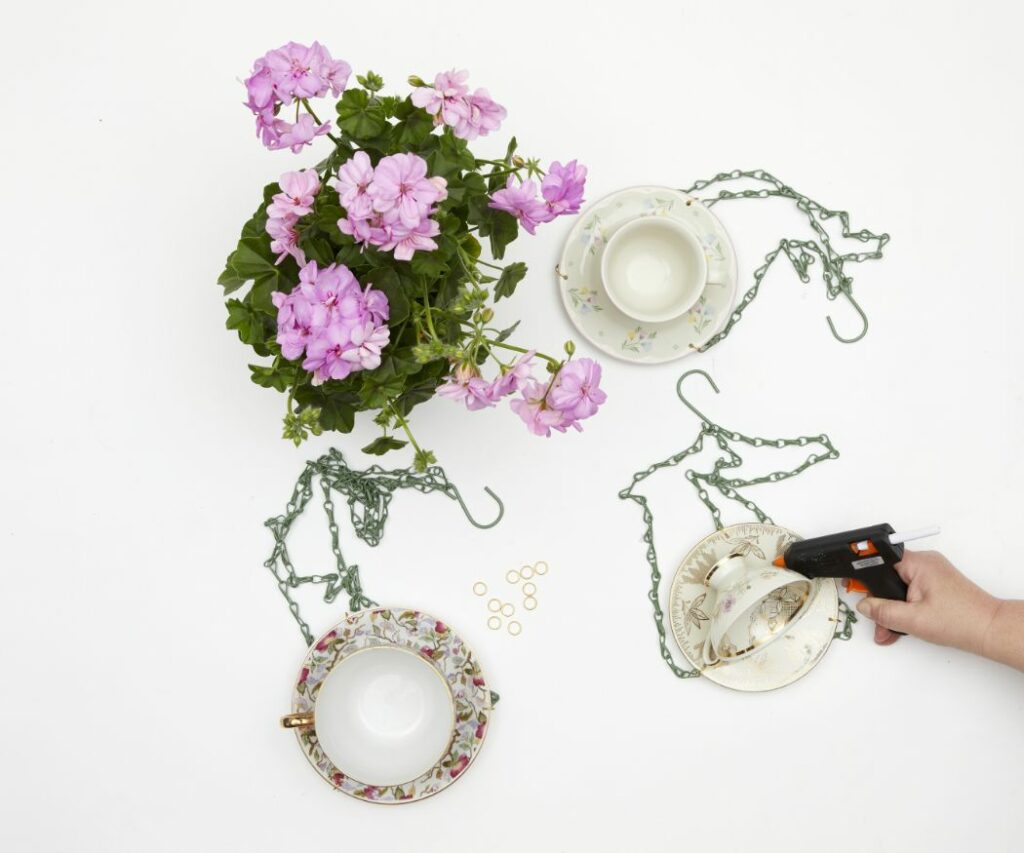
3. Apply a generous amount of hot glue to the centre of the saucer and place the cup on top. Press firmly and hold for about 30 seconds until the glue starts to set. Allow to cool for at least 5 minutes before continuing.
4. For the cup you want to plant up with a geranium, first place a few pebbles or clay shards in the bottom of the cup – this will ensure better drainage. Then carefully insert the geranium.
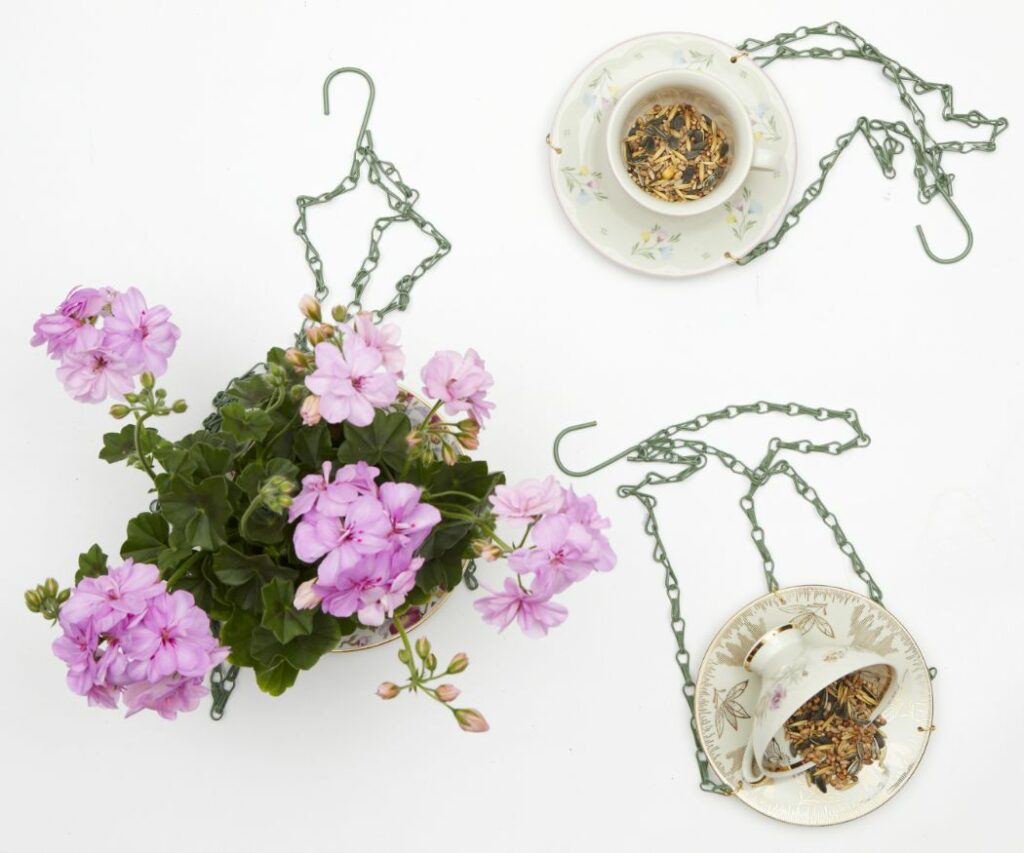
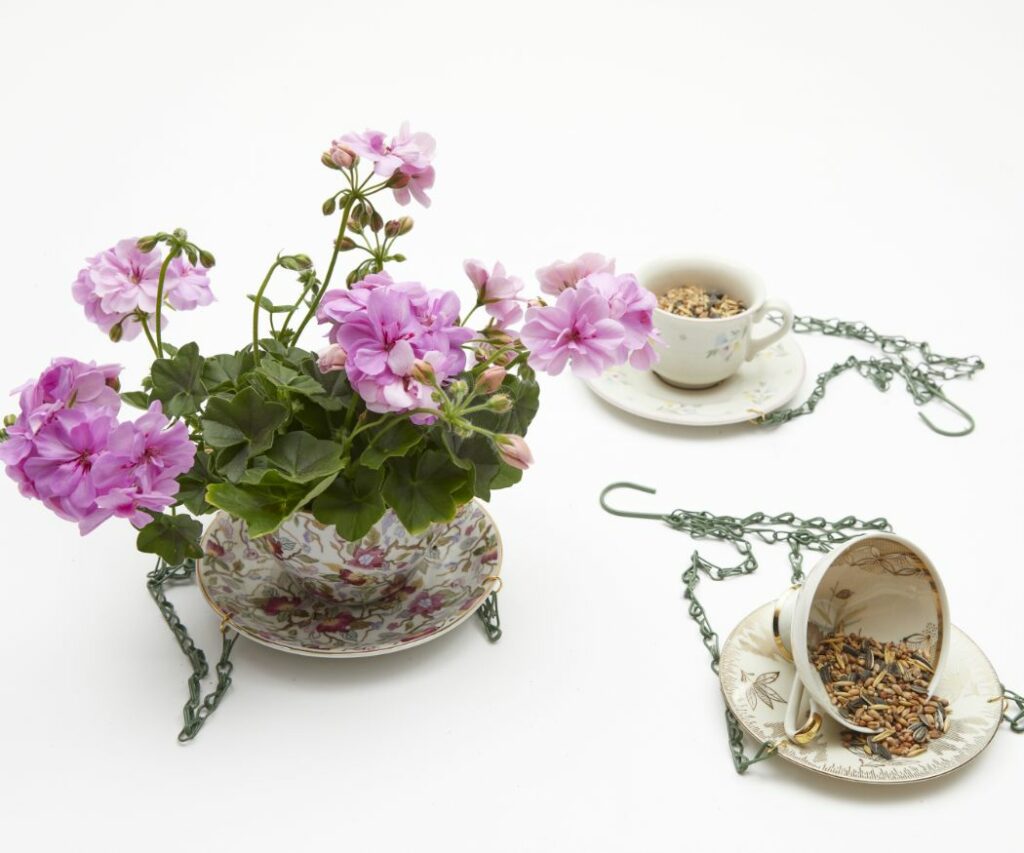
5. Fill two of the cups with birdfood. You can also lie the cup on its side on the saucer for a cosy, covered bird feeder.
6. Hang up the finished planters with a hook on a branch or under a covered patio – and enjoy flowering geraniums and happy garden birds!
➡️ Geraniums care: 7 golden rules for maximum flowering
Craft time: Make your own macramé hanging plant holder with our easy guide
Knot by knot, create your own stylish, handmade macramé plant holder: our step-by-step video shows you how it’s done in just four minutes. With a list of materials, it’s super easy to follow & perfect for beginners – it’s really fun.
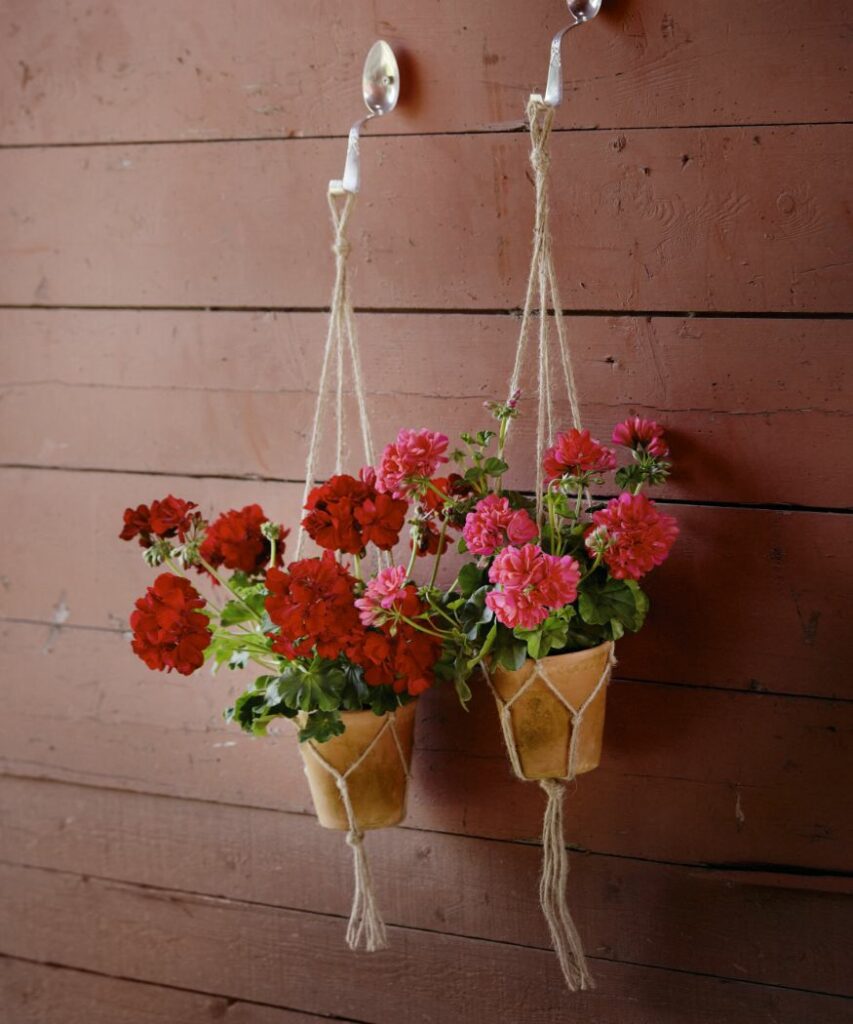
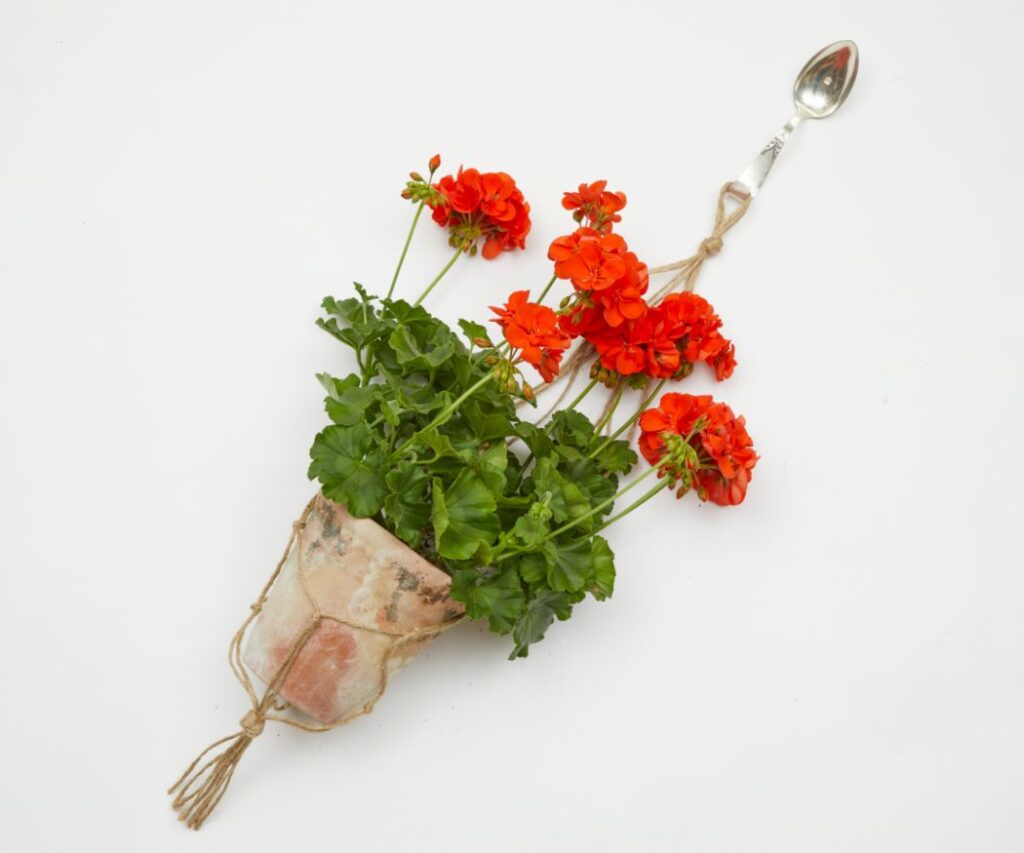
Project idea 3: Simple macramé hanging baskets on spoon hooks
Knotted holders make great hanging planters and the latest trend is the macramé hanging basket. It’s a wonderful way to display plants tastefully. Here, two hanging baskets of flowering geraniums add a special touch. The upcycled wall hooks, made from old teaspoons, are a charming detail you can make in just a few steps.
What you need:
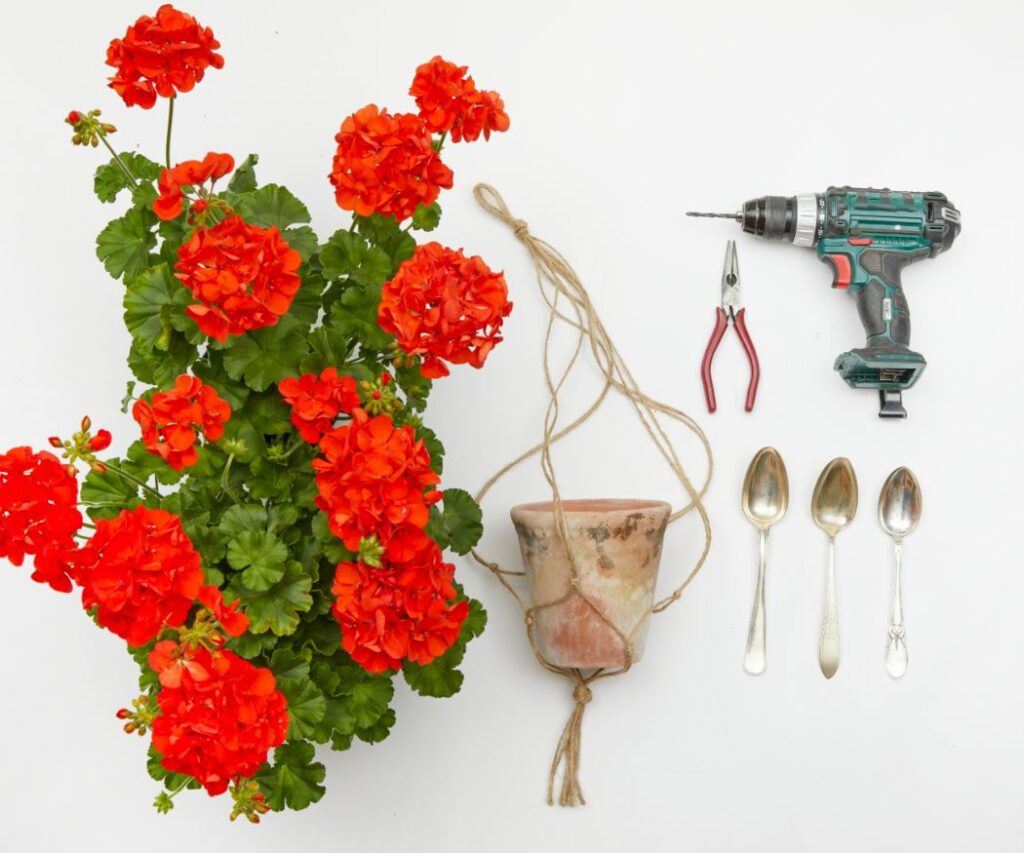
For the spoon wall hooks:
– 2 sturdy old teaspoons
– Pliers for bending
– Drill with metal drill bit
– Screws & wall plugs for fixing
For the macramé hanging planter
– ready-made macramé holder
– terracotta pot with flowering geranium
Or to make it yourself:
– Macramé cord (approx. 3-4mm thick, 8 x 2m lengths)
– wooden or metal ring (for hanging)
– Scissors
– terracotta pot with flowering geranium
➡️ Instructions for a reef/square knot
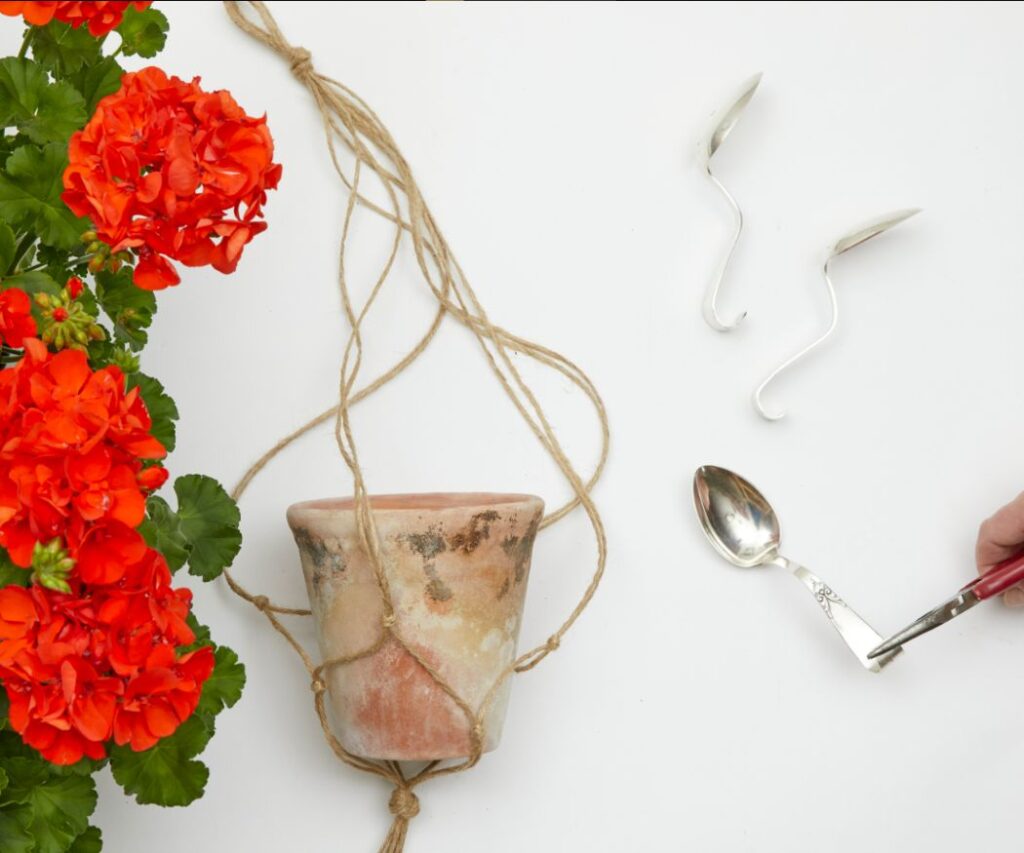
Step-by-step instructions
- Use the pliers to bend the spoon handles into a hook shape. The bend usually doesn’t happen where the pliers are, but a little bit above them, so place the pliers in the lower third of the spoon handle.
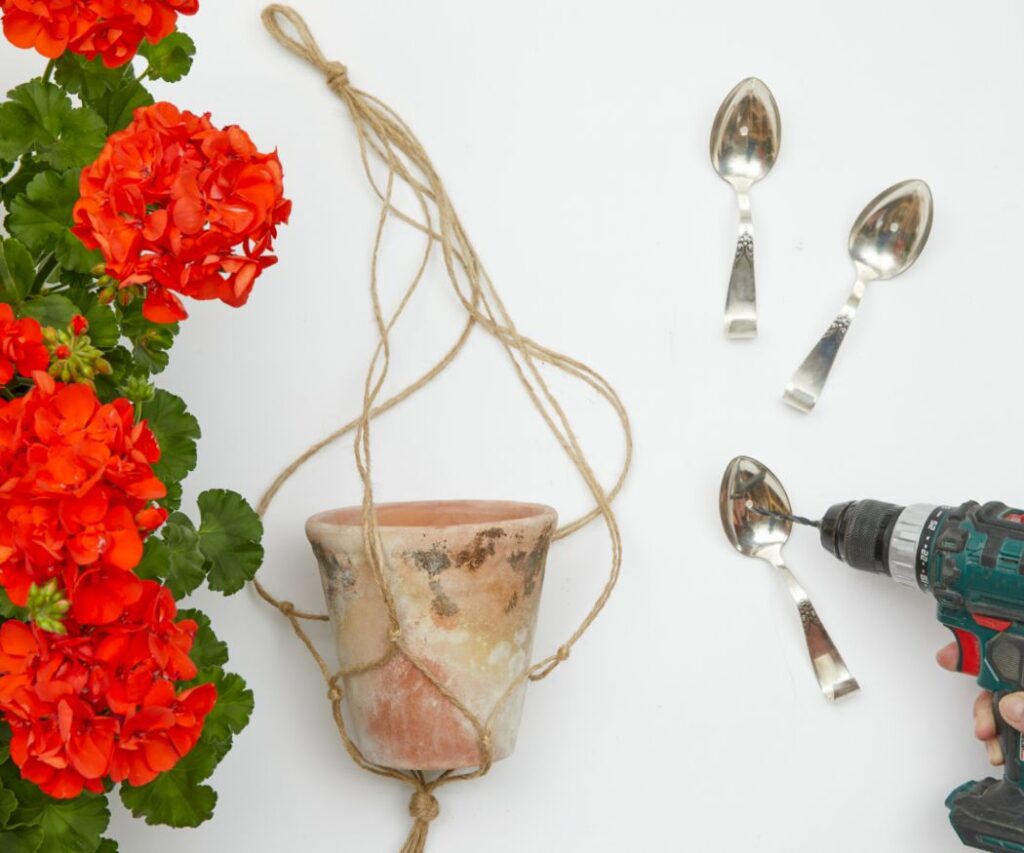
- Next, use a drill to make a hole in the centre of the spoon bowl. This will allow you to attach the hook to the wall.
- Fix the spoon hooks to the wall using wall plugs and screws.
- Place the terracotta pot containing the flowering geranium in the macramé basket and hang it on the spoon hook. Your boho, upcycled hanging basket is finished – perfect for the balcony, patio or garden!
From old to beautiful: Geranium hanging basket project
In this video we show you how to create a special hanging display from an old bicycle wheel and a few simple materials. Ideal for anyone who likes getting creative and giving their plants a special spot.
Step-by-step instructions guide you through the project, from spray-painting the wheel to planting up the pots with geraniums and passion flowers. You don’t need to be a pro; it’s just a bit of fun. You’ll end up with a truly unique piece that celebrates spring and adds a personal touch to your outdoor space. Watch the video and be inspired! (There are some more balcony and patio decorating ideas at the beginning.)
➡️ Balcony project: Make your own hanging basket – watch the tutorial now
Tips to prevent waterlogging
Most containers for homemade hanging planters don’t have drainage holes. To prevent waterlogging and root rot, you can:
- Place a drainage layer of pebbles, expanded clay or clay shards in the bottom of the pot.
- Place the plant in its pot straight into the hanging basket instead of planting the geranium in soil – this way excess water will remain in the inner pot and can be easily poured out if necessary.
- Be careful when watering and only water as much as the soil can actually absorb.
- Hang the basket/planter in a bright but sheltered place so your geranium doesn’t accidentally drown in the rain.
Caring for geraniums in homemade hanging baskets
Your geraniums will grow throughout the summer. As the pots in these projects are often not very big, these low-maintenance favourites will need a little more care. Pay particular attention to watering and fertilising. If the plants become potbound (you have to water them constantly, they stop growing and have fewer blooms), you can replant them later in larger containers. This will give the plants more soil and allow them to develop better. This will also encourage flowering.
Share your DIY creations with us!
Have you made a hanging basket or come up with your own creative idea? We look forward to seeing your floral artworks!
📸 Share a photo on Instagram with the hashtag #GeraniumDIY so we can admire your results.
Looking for more geranium inspiration, decorating ideas and craft projects? Browse our decorating tips and follow us on Facebook, Instagram, Pinterest and YouTube for even more creative ideas!
FAQs
Can I combine other plants with geraniums in a hanging basket?
Yes, not just geraniums but other plants can thrive in a hanging basket, provided it’s big enough. Make sure the plants all have similar care requirements, especially in terms of water and sunlight. For ideas using hanging baskets smaller than 18cm diameter, it’s best to stick to a single geranium plant.
What’s the advantage of upcycled hanging planters?
Upcycling is a creative and environmentally friendly way to reuse old or unwanted items. For example, instead of throwing something away, you can turn it into a beautiful hanging basket to give your garden or balcony a unique and personal touch. Upcycling is also cheaper and more sustainable because it uses fewer virgin materials.
➡️ More upcycling ideas
How do I care for my hanging basket geraniums?
Geraniums are easy to look after. Water regularly and make sure excess liquid can drain away to avoid waterlogging. Geraniums prefer a sunny location and should be fed regularly with a liquid fertiliser to ensure vigorous flowering. Remove wilted blooms to allow the plant to redirect its energy into new ones.
➡️ Geranium care: 7 golden rules for maximum blooms
Where can I find out more about geranium hanging baskets?
In this guide find out how to use geraniums in hanging planters to create an outdoor space that looks like something out of a glossy magazine.
➡️ Easy-care geranium hanging baskets – The ultimate guide
Can I put a hanging basket indoors too?
Yes, hanging planters are not only suitable for outdoor use, they can also enhance indoor spaces. Make sure your geraniums get plenty of light. Regal pelargoniums (Pelargonium grandiflorum) and scented geraniums are ideal for bright spots indoors. Scented geraniums are even edible, as long as you buy untreated ones.
➡️ Regal pelargoniums: Origins, care and uses
How does the macramé reef/square knot work?
Simple reef/square knots are the most important and most commonly used knots in macramé – and they’re super easy to learn! Just follow these step-by-step instructions:
1 Prepare four strings
You will need four strings: two in the middle (they will stay straight) and two on the outside (they will knot around the middle ones). The middle strings are called ‘carrier strings’ and the outer strings are ‘working strings’.
2 Lay the left-hand string over the centre
Take the left-hand working string and place it over the two middle carrier strings so that they form the shape of a ‘4’.
3 Pull the right-hand string under the centre
Now pass the right working string under the central carrier strings and pull it through the loop of the ‘4’ on the left side.
4 Tighten the knot
Pull both working strings tight evenly – you have tied a half reef/square knot!
5 Repeat on the other side
Now do the same, but in reverse: Put the right sting over the centre two strings (this time a backwards ‘4’). Pull the left string under the centre strings and through the loop. Pull tight – done! The first step for your twine hanging basket is complete.
If you tie several reef/square knots in a row, you will create a symmetrical pattern.
Glossary
Boho style
Boho style, also known as Bohemian style, is a creative interior design trend that combines different cultural influences. It favours natural materials such as wood, linen, raffia and wool. Patterns such as flowers and geometric shapes are typical. The boho style has a relaxed, individual feel, ideal for a customised hanging basket.
Masking/gaffer tape
Masking/gaffer tape is a special, highly adhesive tape often used in film production or for craftwork. It has a matt surface and can be easily removed without leaving any traces.
Macramé
A craft in which strings are tied together in knotted patterns to create decorative objects such as hanging planters.
Drainage
Drainage is when excess water can drain away from a planter. This prevents root rot and keeps the plants healthy.